- <div align="center">
- <a href="https://demo.ragflow.io/">
- <img src="web/src/assets/logo-with-text.png" width="520" alt="ragflow logo">
- </a>
- </div>
-
- <p align="center">
- <a href="./README.md"><img alt="README in English" src="https://img.shields.io/badge/English-DFE0E5"></a>
- <a href="./README_zh.md"><img alt="简体中文版自述文件" src="https://img.shields.io/badge/简体中文-DFE0E5"></a>
- <a href="./README_tzh.md"><img alt="繁體版中文自述文件" src="https://img.shields.io/badge/繁體中文-DFE0E5"></a>
- <a href="./README_ja.md"><img alt="日本語のREADME" src="https://img.shields.io/badge/日本語-DFE0E5"></a>
- <a href="./README_ko.md"><img alt="한국어" src="https://img.shields.io/badge/한국어-DBEDFA"></a>
- <a href="./README_id.md"><img alt="Bahasa Indonesia" src="https://img.shields.io/badge/Bahasa Indonesia-DFE0E5"></a>
- <a href="./README_pt_br.md"><img alt="Português(Brasil)" src="https://img.shields.io/badge/Português(Brasil)-DFE0E5"></a>
- </p>
-
- <p align="center">
- <a href="https://x.com/intent/follow?screen_name=infiniflowai" target="_blank">
- <img src="https://img.shields.io/twitter/follow/infiniflow?logo=X&color=%20%23f5f5f5" alt="follow on X(Twitter)">
- </a>
- <a href="https://demo.ragflow.io" target="_blank">
- <img alt="Static Badge" src="https://img.shields.io/badge/Online-Demo-4e6b99">
- </a>
- <a href="https://hub.docker.com/r/infiniflow/ragflow" target="_blank">
- <img src="https://img.shields.io/docker/pulls/infiniflow/ragflow?label=Docker%20Pulls&color=0db7ed&logo=docker&logoColor=white&style=flat-square" alt="docker pull infiniflow/ragflow:v0.20.1">
- </a>
- <a href="https://github.com/infiniflow/ragflow/releases/latest">
- <img src="https://img.shields.io/github/v/release/infiniflow/ragflow?color=blue&label=Latest%20Release" alt="Latest Release">
- </a>
- <a href="https://github.com/infiniflow/ragflow/blob/main/LICENSE">
- <img height="21" src="https://img.shields.io/badge/License-Apache--2.0-ffffff?labelColor=d4eaf7&color=2e6cc4" alt="license">
- </a>
- <a href="https://deepwiki.com/infiniflow/ragflow">
- <img alt="Ask DeepWiki" src="https://deepwiki.com/badge.svg">
- </a>
- </p>
-
- <h4 align="center">
- <a href="https://ragflow.io/docs/dev/">Document</a> |
- <a href="https://github.com/infiniflow/ragflow/issues/4214">Roadmap</a> |
- <a href="https://twitter.com/infiniflowai">Twitter</a> |
- <a href="https://discord.gg/NjYzJD3GM3">Discord</a> |
- <a href="https://demo.ragflow.io">Demo</a>
- </h4>
-
- #
-
- ## 💡 RAGFlow란?
-
- [RAGFlow](https://ragflow.io/)는 심층 문서 이해에 기반한 오픈소스 RAG (Retrieval-Augmented Generation) 엔진입니다. 이 엔진은 대규모 언어 모델(LLM)과 결합하여 정확한 질문 응답 기능을 제공하며, 다양한 복잡한 형식의 데이터에서 신뢰할 수 있는 출처를 바탕으로 한 인용을 통해 이를 뒷받침합니다. RAGFlow는 규모에 상관없이 모든 기업에 최적화된 RAG 워크플로우를 제공합니다.
-
- ## 🎮 데모
-
- 데모를 [https://demo.ragflow.io](https://demo.ragflow.io)에서 실행해 보세요.
-
- <div align="center" style="margin-top:20px;margin-bottom:20px;">
- <img src="https://raw.githubusercontent.com/infiniflow/ragflow-docs/refs/heads/image/image/chunking.gif" width="1200"/>
- <img src="https://raw.githubusercontent.com/infiniflow/ragflow-docs/refs/heads/image/image/agentic-dark.gif" width="1200"/>
- </div>
-
- ## 🔥 업데이트
-
- - 2025-08-08 OpenAI의 최신 GPT-5 시리즈 모델을 지원합니다.
- - 2025-08-04 새로운 모델인 Kimi K2와 Grok 4를 포함하여 지원합니다.
- - 2025-08-01 에이전트 워크플로우와 MCP를 지원합니다.
- - 2025-05-23 Agent에 Python/JS 코드 실행기 구성 요소를 추가합니다.
- - 2025-05-05 언어 간 쿼리를 지원합니다.
- - 2025-03-19 PDF 또는 DOCX 파일 내의 이미지를 이해하기 위해 다중 모드 모델을 사용하는 것을 지원합니다.
- - 2025-02-28 인터넷 검색(TAVILY)과 결합되어 모든 LLM에 대한 심층 연구를 지원합니다.
- - 2024-12-18 DeepDoc의 문서 레이아웃 분석 모델 업그레이드.
- - 2024-08-22 RAG를 통해 SQL 문에 텍스트를 지원합니다.
-
- ## 🎉 계속 지켜봐 주세요
-
- ⭐️우리의 저장소를 즐겨찾기에 등록하여 흥미로운 새로운 기능과 업데이트를 최신 상태로 유지하세요! 모든 새로운 릴리스에 대한 즉시 알림을 받으세요! 🌟
-
- <div align="center" style="margin-top:20px;margin-bottom:20px;">
- <img src="https://github.com/user-attachments/assets/18c9707e-b8aa-4caf-a154-037089c105ba" width="1200"/>
- </div>
-
- ## 🌟 주요 기능
-
- ### 🍭 **"Quality in, quality out"**
-
- - [심층 문서 이해](./deepdoc/README.md)를 기반으로 복잡한 형식의 비정형 데이터에서 지식을 추출합니다.
- - 문자 그대로 무한한 토큰에서 "데이터 속의 바늘"을 찾아냅니다.
-
- ### 🍱 **템플릿 기반의 chunking**
-
- - 똑똑하고 설명 가능한 방식.
- - 다양한 템플릿 옵션을 제공합니다.
-
- ### 🌱 **할루시네이션을 줄인 신뢰할 수 있는 인용**
-
- - 텍스트 청킹을 시각화하여 사용자가 개입할 수 있도록 합니다.
- - 중요한 참고 자료와 추적 가능한 인용을 빠르게 확인하여 신뢰할 수 있는 답변을 지원합니다.
-
- ### 🍔 **다른 종류의 데이터 소스와의 호환성**
-
- - 워드, 슬라이드, 엑셀, 텍스트 파일, 이미지, 스캔본, 구조화된 데이터, 웹 페이지 등을 지원합니다.
-
- ### 🛀 **자동화되고 손쉬운 RAG 워크플로우**
-
- - 개인 및 대규모 비즈니스에 맞춘 효율적인 RAG 오케스트레이션.
- - 구성 가능한 LLM 및 임베딩 모델.
- - 다중 검색과 결합된 re-ranking.
- - 비즈니스와 원활하게 통합할 수 있는 직관적인 API.
-
- ## 🔎 시스템 아키텍처
-
- <div align="center" style="margin-top:20px;margin-bottom:20px;">
- <img src="https://github.com/infiniflow/ragflow/assets/12318111/d6ac5664-c237-4200-a7c2-a4a00691b485" width="1000"/>
- </div>
-
- ## 🎬 시작하기
-
- ### 📝 사전 준비 사항
-
- - CPU >= 4 cores
- - RAM >= 16 GB
- - Disk >= 50 GB
- - Docker >= 24.0.0 & Docker Compose >= v2.26.1
- - [gVisor](https://gvisor.dev/docs/user_guide/install/): RAGFlow의 코드 실행기(샌드박스) 기능을 사용하려는 경우에만 필요합니다.
-
- > [!TIP]
- > 로컬 머신(Windows, Mac, Linux)에 Docker가 설치되지 않은 경우, [Docker 엔진 설치](<(https://docs.docker.com/engine/install/)>)를 참조하세요.
-
- ### 🚀 서버 시작하기
-
- 1. `vm.max_map_count`가 262144 이상인지 확인하세요:
-
- > `vm.max_map_count`의 값을 아래 명령어를 통해 확인하세요:
- >
- > ```bash
- > $ sysctl vm.max_map_count
- > ```
- >
- > 만약 `vm.max_map_count` 이 262144 보다 작다면 값을 쟈설정하세요.
- >
- > ```bash
- > # 이 경우에 262144로 설정했습니다.:
- > $ sudo sysctl -w vm.max_map_count=262144
- > ```
- >
- > 이 변경 사항은 시스템 재부팅 후에 초기화됩니다. 변경 사항을 영구적으로 적용하려면 /etc/sysctl.conf 파일에 vm.max_map_count 값을 추가하거나 업데이트하세요:
- >
- > ```bash
- > vm.max_map_count=262144
- > ```
-
- 2. 레포지토리를 클론하세요:
-
- ```bash
- $ git clone https://github.com/infiniflow/ragflow.git
- ```
-
- 3. 미리 빌드된 Docker 이미지를 생성하고 서버를 시작하세요:
-
- > [!CAUTION]
- > 모든 Docker 이미지는 x86 플랫폼을 위해 빌드되었습니다. 우리는 현재 ARM64 플랫폼을 위한 Docker 이미지를 제공하지 않습니다.
- > ARM64 플랫폼을 사용 중이라면, [시스템과 호환되는 Docker 이미지를 빌드하려면 이 가이드를 사용해 주세요](https://ragflow.io/docs/dev/build_docker_image).
-
- > 아래 명령어는 RAGFlow Docker 이미지의 v0.20.1-slim 버전을 다운로드합니다. 다양한 RAGFlow 버전에 대한 설명은 다음 표를 참조하십시오. v0.20.1-slim과 다른 RAGFlow 버전을 다운로드하려면, docker/.env 파일에서 RAGFLOW_IMAGE 변수를 적절히 업데이트한 후 docker compose를 사용하여 서버를 시작하십시오. 예를 들어, 전체 버전인 v0.20.1을 다운로드하려면 RAGFLOW_IMAGE=infiniflow/ragflow:v0.20.1로 설정합니다.
-
- ```bash
- $ cd ragflow/docker
- # Use CPU for embedding and DeepDoc tasks:
- $ docker compose -f docker-compose.yml up -d
-
- # To use GPU to accelerate embedding and DeepDoc tasks:
- # docker compose -f docker-compose-gpu.yml up -d
- ```
-
- | RAGFlow image tag | Image size (GB) | Has embedding models? | Stable? |
- | ----------------- | --------------- | --------------------- | ------------------------ |
- | v0.20.1 | ≈9 | :heavy_check_mark: | Stable release |
- | v0.20.1-slim | ≈2 | ❌ | Stable release |
- | nightly | ≈9 | :heavy_check_mark: | _Unstable_ nightly build |
- | nightly-slim | ≈2 | ❌ | _Unstable_ nightly build |
-
- 1. 서버가 시작된 후 서버 상태를 확인하세요:
-
- ```bash
- $ docker logs -f ragflow-server
- ```
-
- _다음 출력 결과로 시스템이 성공적으로 시작되었음을 확인합니다:_
-
- ```bash
- ____ ___ ______ ______ __
- / __ \ / | / ____// ____// /____ _ __
- / /_/ // /| | / / __ / /_ / // __ \| | /| / /
- / _, _// ___ |/ /_/ // __/ / // /_/ /| |/ |/ /
- /_/ |_|/_/ |_|\____//_/ /_/ \____/ |__/|__/
-
- * Running on all addresses (0.0.0.0)
- ```
-
- > 만약 확인 단계를 건너뛰고 바로 RAGFlow에 로그인하면, RAGFlow가 완전히 초기화되지 않았기 때문에 브라우저에서 `network anormal` 오류가 발생할 수 있습니다.
-
- 2. 웹 브라우저에 서버의 IP 주소를 입력하고 RAGFlow에 로그인하세요.
- > 기본 설정을 사용할 경우, `http://IP_OF_YOUR_MACHINE`만 입력하면 됩니다 (포트 번호는 제외). 기본 HTTP 서비스 포트 `80`은 기본 구성으로 사용할 때 생략할 수 있습니다.
- 3. [service_conf.yaml.template](./docker/service_conf.yaml.template) 파일에서 원하는 LLM 팩토리를 `user_default_llm`에 선택하고, `API_KEY` 필드를 해당 API 키로 업데이트하세요.
-
- > 자세한 내용은 [llm_api_key_setup](https://ragflow.io/docs/dev/llm_api_key_setup)를 참조하세요.
-
- _이제 쇼가 시작됩니다!_
-
- ## 🔧 설정
-
- 시스템 설정과 관련하여 다음 파일들을 관리해야 합니다:
-
- - [.env](./docker/.env): `SVR_HTTP_PORT`, `MYSQL_PASSWORD`, `MINIO_PASSWORD`와 같은 시스템의 기본 설정을 포함합니다.
- - [service_conf.yaml.template](./docker/service_conf.yaml.template): 백엔드 서비스를 구성합니다.
- - [docker-compose.yml](./docker/docker-compose.yml): 시스템은 [docker-compose.yml](./docker/docker-compose.yml)을 사용하여 시작됩니다.
-
- [.env](./docker/.env) 파일의 변경 사항이 [service_conf.yaml.template](./docker/service_conf.yaml.template) 파일의 내용과 일치하도록 해야 합니다.
-
- > [./docker/README](./docker/README.md) 파일 ./docker/README은 service_conf.yaml.template 파일에서 ${ENV_VARS}로 사용할 수 있는 환경 설정과 서비스 구성에 대한 자세한 설명을 제공합니다.
-
- 기본 HTTP 서비스 포트(80)를 업데이트하려면 [docker-compose.yml](./docker/docker-compose.yml) 파일에서 `80:80`을 `<YOUR_SERVING_PORT>:80`으로 변경하세요.
-
- > 모든 시스템 구성 업데이트는 적용되기 위해 시스템 재부팅이 필요합니다.
- >
- > ```bash
- > $ docker compose -f docker-compose.yml up -d
- > ```
-
- ### Elasticsearch 에서 Infinity 로 문서 엔진 전환
-
- RAGFlow 는 기본적으로 Elasticsearch 를 사용하여 전체 텍스트 및 벡터를 저장합니다. [Infinity]로 전환(https://github.com/infiniflow/infinity/), 다음 절차를 따르십시오.
-
- 1. 실행 중인 모든 컨테이너를 중지합니다.
- ```bash
- $docker compose-f docker/docker-compose.yml down -v
- ```
- Note: `-v` 는 docker 컨테이너의 볼륨을 삭제하고 기존 데이터를 지우며, 이 작업은 컨테이너를 중지하는 것과 동일합니다.
- 2. **docker/.env**의 "DOC_ENGINE" 을 "infinity" 로 설정합니다.
- 3. 컨테이너 부팅:
- ```bash
- $docker compose-f docker/docker-compose.yml up -d
- ```
- > [!WARNING]
- > Linux/arm64 시스템에서 Infinity로 전환하는 것은 공식적으로 지원되지 않습니다.
-
- ## 🔧 소스 코드로 Docker 이미지를 컴파일합니다(임베딩 모델 포함하지 않음)
-
- 이 Docker 이미지의 크기는 약 1GB이며, 외부 대형 모델과 임베딩 서비스에 의존합니다.
-
- ```bash
- git clone https://github.com/infiniflow/ragflow.git
- cd ragflow/
- docker build --platform linux/amd64 --build-arg LIGHTEN=1 -f Dockerfile -t infiniflow/ragflow:nightly-slim .
- ```
-
- ## 🔧 소스 코드로 Docker 이미지를 컴파일합니다(임베딩 모델 포함)
-
- 이 Docker의 크기는 약 9GB이며, 이미 임베딩 모델을 포함하고 있으므로 외부 대형 모델 서비스에만 의존하면 됩니다.
-
- ```bash
- git clone https://github.com/infiniflow/ragflow.git
- cd ragflow/
- docker build --platform linux/amd64 -f Dockerfile -t infiniflow/ragflow:nightly .
- ```
-
- ## 🔨 소스 코드로 서비스를 시작합니다.
-
- 1. uv를 설치하거나 이미 설치된 경우 이 단계를 건너뜁니다:
-
- ```bash
- pipx install uv pre-commit
- ```
-
- 2. 소스 코드를 클론하고 Python 의존성을 설치합니다:
-
- ```bash
- git clone https://github.com/infiniflow/ragflow.git
- cd ragflow/
- uv sync --python 3.10 --all-extras # install RAGFlow dependent python modules
- uv run download_deps.py
- pre-commit install
- ```
-
- 3. Docker Compose를 사용하여 의존 서비스(MinIO, Elasticsearch, Redis 및 MySQL)를 시작합니다:
-
- ```bash
- docker compose -f docker/docker-compose-base.yml up -d
- ```
-
- `/etc/hosts` 에 다음 줄을 추가하여 **conf/service_conf.yaml** 에 지정된 모든 호스트를 `127.0.0.1` 로 해결합니다:
-
- ```
- 127.0.0.1 es01 infinity mysql minio redis sandbox-executor-manager
- ```
-
- 4. HuggingFace에 접근할 수 없는 경우, `HF_ENDPOINT` 환경 변수를 설정하여 미러 사이트를 사용하세요:
-
- ```bash
- export HF_ENDPOINT=https://hf-mirror.com
- ```
-
- 5. 만약 운영 체제에 jemalloc이 없으면 다음 방식으로 설치하세요:
-
- ```bash
- # ubuntu
- sudo apt-get install libjemalloc-dev
- # centos
- sudo yum install jemalloc
- ```
-
- 6. 백엔드 서비스를 시작합니다:
-
- ```bash
- source .venv/bin/activate
- export PYTHONPATH=$(pwd)
- bash docker/launch_backend_service.sh
- ```
-
- 7. 프론트엔드 의존성을 설치합니다:
-
- ```bash
- cd web
- npm install
- ```
-
- 8. 프론트엔드 서비스를 시작합니다:
-
- ```bash
- npm run dev
- ```
-
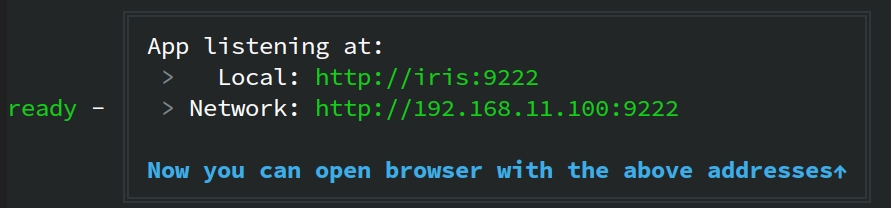
- _다음 인터페이스는 시스템이 성공적으로 시작되었음을 나타냅니다:_
-
- 
-
-
- 9. 개발이 완료된 후 RAGFlow 프론트엔드 및 백엔드 서비스를 중지합니다.
-
- ```bash
- pkill -f "ragflow_server.py|task_executor.py"
- ```
-
-
- ## 📚 문서
-
- - [Quickstart](https://ragflow.io/docs/dev/)
- - [Configuration](https://ragflow.io/docs/dev/configurations)
- - [Release notes](https://ragflow.io/docs/dev/release_notes)
- - [User guides](https://ragflow.io/docs/dev/category/guides)
- - [Developer guides](https://ragflow.io/docs/dev/category/developers)
- - [References](https://ragflow.io/docs/dev/category/references)
- - [FAQs](https://ragflow.io/docs/dev/faq)
-
- ## 📜 로드맵
-
- [RAGFlow 로드맵 2025](https://github.com/infiniflow/ragflow/issues/4214)을 확인하세요.
-
- ## 🏄 커뮤니티
-
- - [Discord](https://discord.gg/NjYzJD3GM3)
- - [Twitter](https://twitter.com/infiniflowai)
- - [GitHub Discussions](https://github.com/orgs/infiniflow/discussions)
-
- ## 🙌 컨트리뷰션
-
- RAGFlow는 오픈소스 협업을 통해 발전합니다. 이러한 정신을 바탕으로, 우리는 커뮤니티의 다양한 기여를 환영합니다. 참여하고 싶으시다면, 먼저 [가이드라인](https://ragflow.io/docs/dev/contributing)을 검토해 주세요.
|